Take advantage of tried and true methods for providing excellent support via Tracker.

Let Users View and Track Their Requests 24/7

Providing a restricted user account is the easiest way to allow end users to view and track status of their requests at any time. All you need to do is set up the user account.

Restricted User Home Page

The system automatically limits the user to see only the records they've added to the system. You don't have to do a lot of configuration work to lock it down. The following video has more information about Restricted Users.

Provide Self-Service Information

A Knowledge Base allows your end users to find the information they need without contacting your Support or Help Desk organization.

KB Search Page

Check out this blog post for more information about adding a KB to your system.

Let Tracker Maintain Deadlines

Customer A's service contract says you'll respond within 1 hour. Customer B's time frame is 2 hours. Plug these into the Alerts feature to help you meet these deadlines.

Send Alerts on Add

See more in the video below or get detailed steps in this Alerts Knowledge Base article.

Tracker has a wide variety of features & options, but some situations require a minimalist approach. Tracker has the flexibility to allow you to pare things down to show users the bare minimum to keep them focused on what's important.

Restricted Users

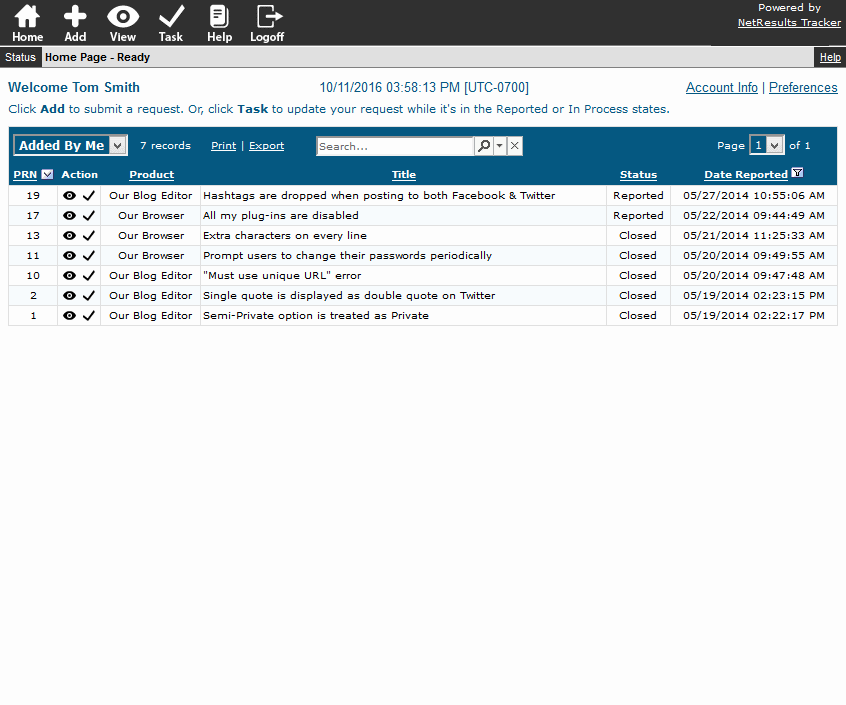
For users such as customers, vendors and end users, who only need to see the records they've reported, a Restricted user account is a great fit. No extra configuration is needed for the user to only have access to their own records. The following video has more information about Restricted Users.

User Group Privileges

A good place to scale things back is in the user group privileges. All standard users are members of the Users group and all Restricted users are members of the RestrictedUsers group. When deciding which privileges to disable for other user groups, you should ensure the privileges are also disabled in these groups since users inherit a basic set of privileges from these groups.

User Groups

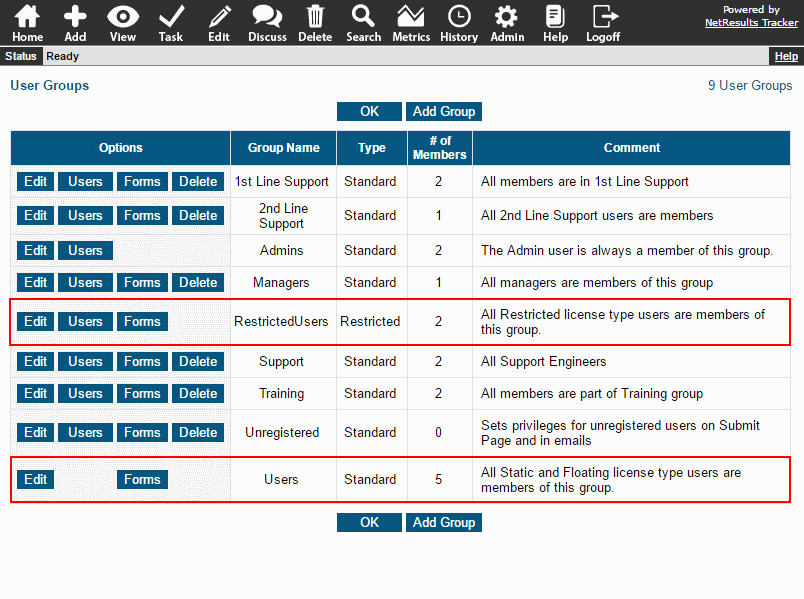
To make changes to user group privileges:

  1. Login as Admin and click on the Admin icon.
  2. Click on the User Accounts link.
  3. Click on the Manage Groups button.
  4. Click on the Edit button to the left of the user group you wish to modify.
  5. Check the box for a privilege to enable or UNcheck to disable, then click OK to save the changes.

See the Online Help Guide for a description of each privilege.
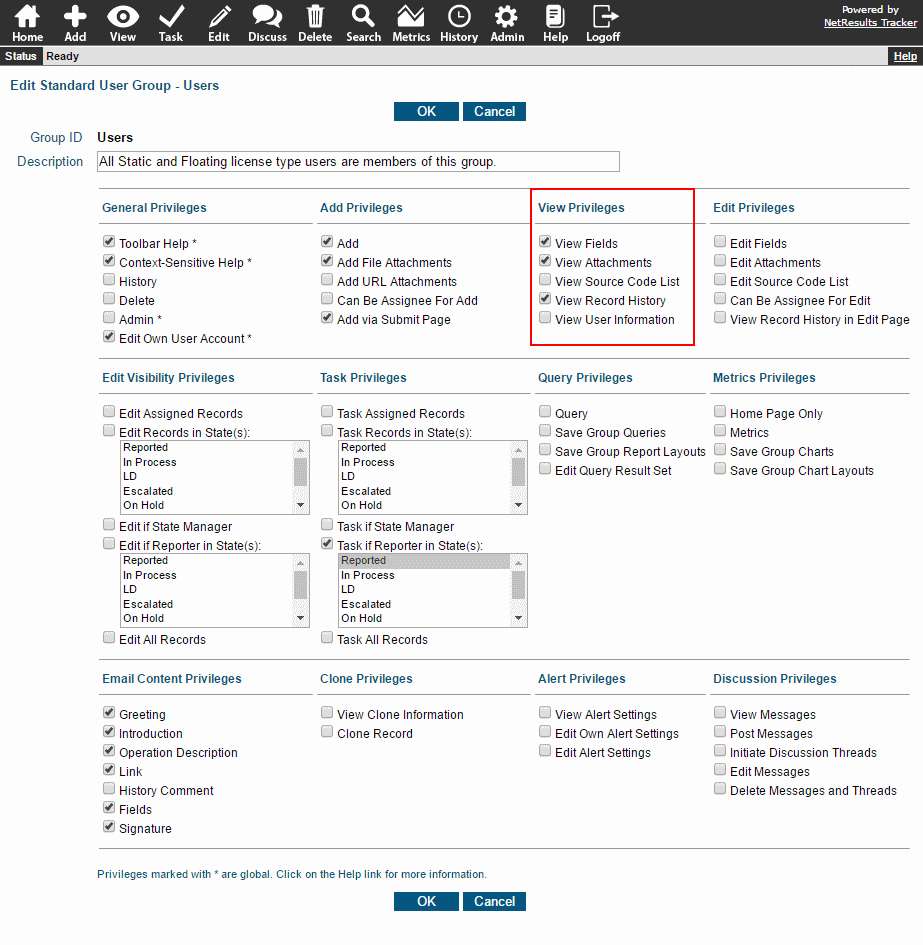
View Page

Each section on the View Page is tied to a privilege so you can hide sections that are not necessary for a user group.

View Privileges

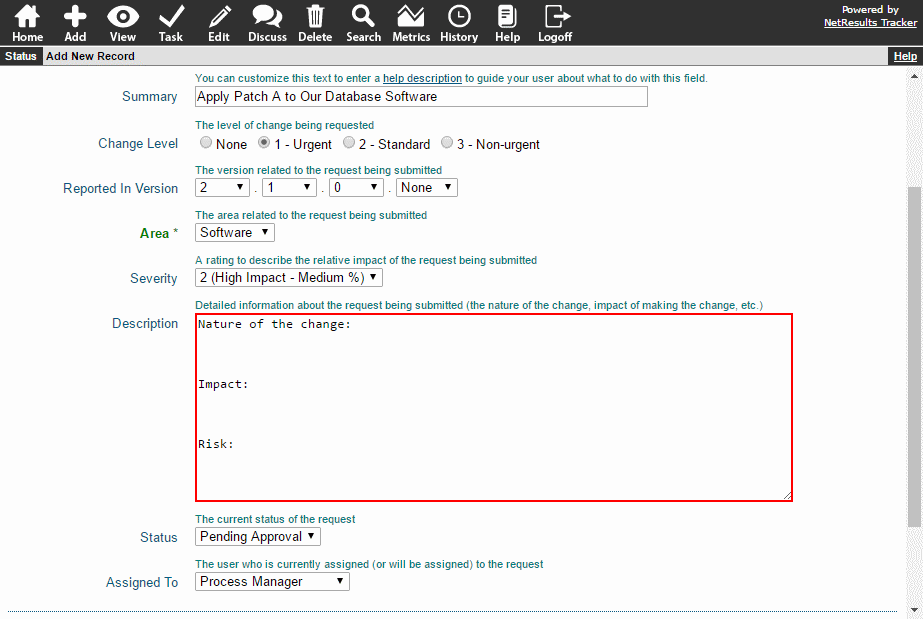
You can also set which fields are displayed for each user group. This allows you to show users only the fields they need to see.

View Page Field Visibility

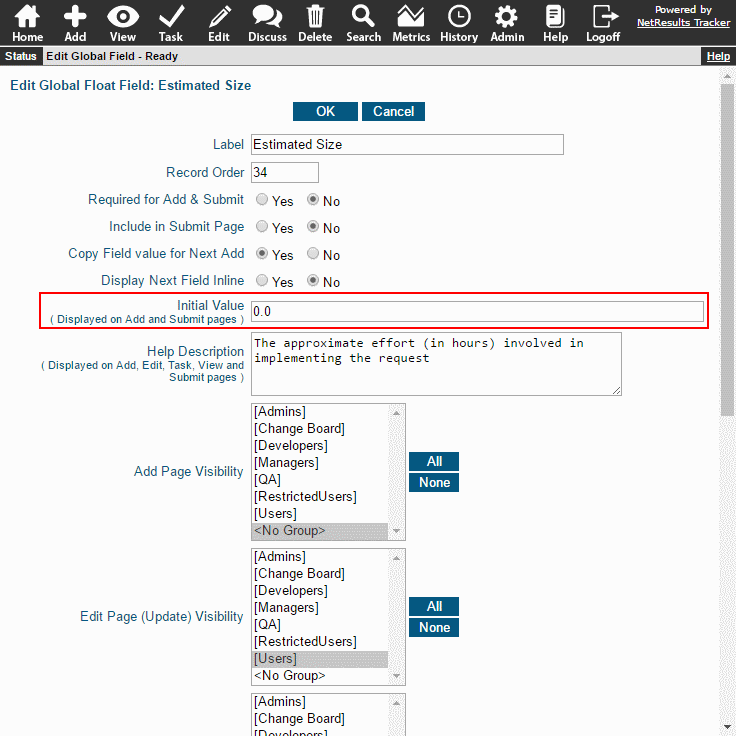
To choose which user groups can see a field on the View Page:

  1. Login as Admin and click on the Admin icon.
  2. Click on the Fields link.
  3. Click on the Edit button to the left of the field you wish to modify.
  4. Scroll down to find the View Page Visibility option.
  5. Select the user groups that should be able to see the field on the View Page. To select multiple user groups, hold down the Ctrl button on your keyboard as you select user groups.
  6. Click OK to save the changes.
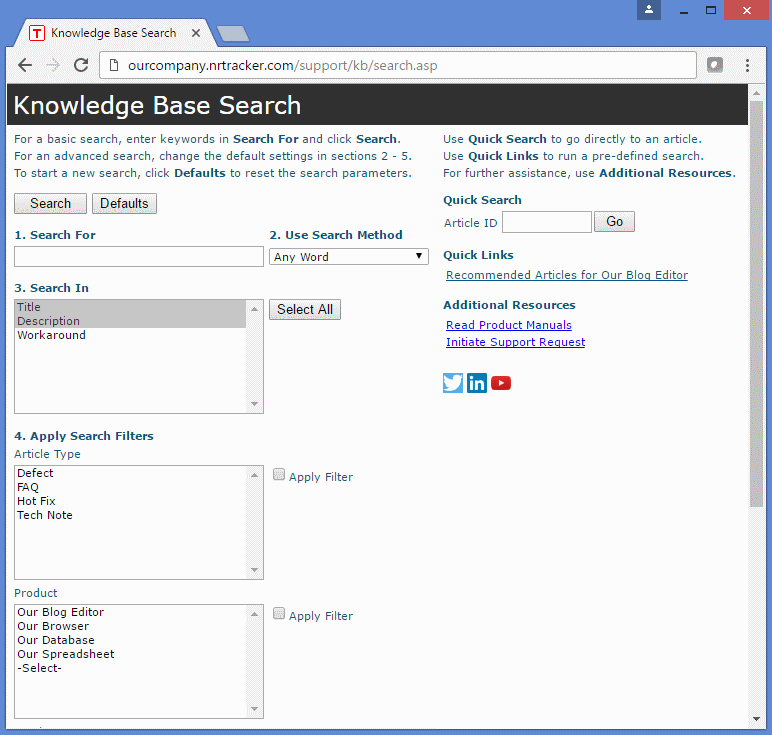
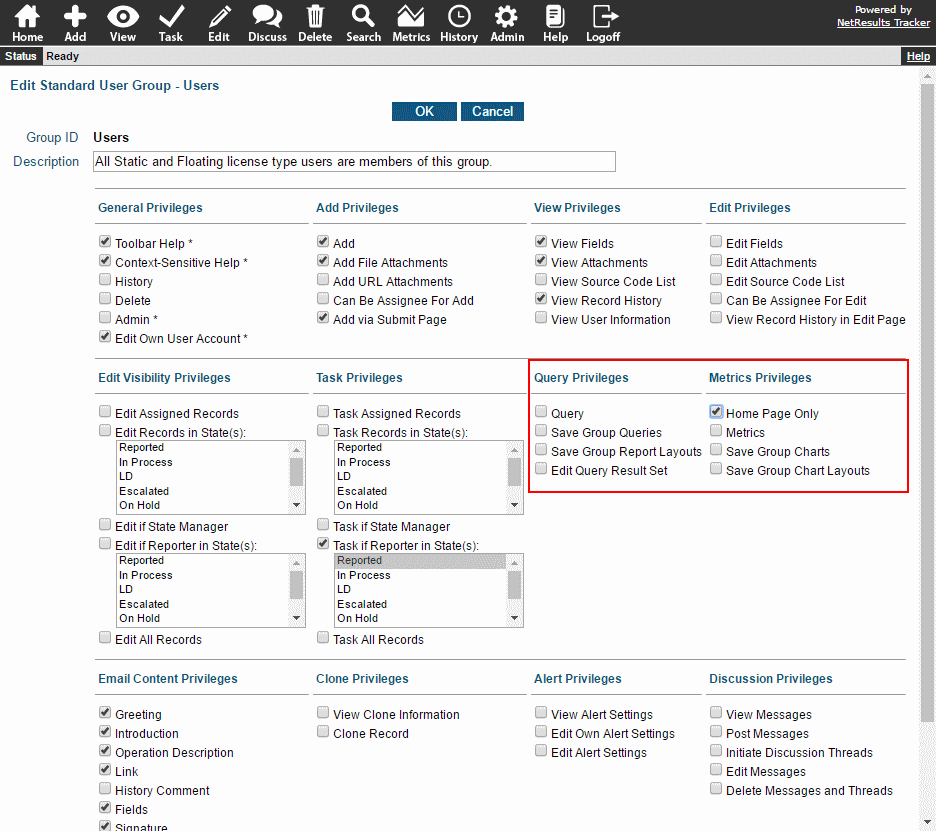
Reports

For some users, you may want to make reports available to them without giving them access to the Search and Metrics pages. They can run reports you make available to their user group on the Home Page, but cannot run ad-hoc report or save their own. This is done by disabling the Query Privileges and selecting "Home Page Only" in Metrics Privileges.
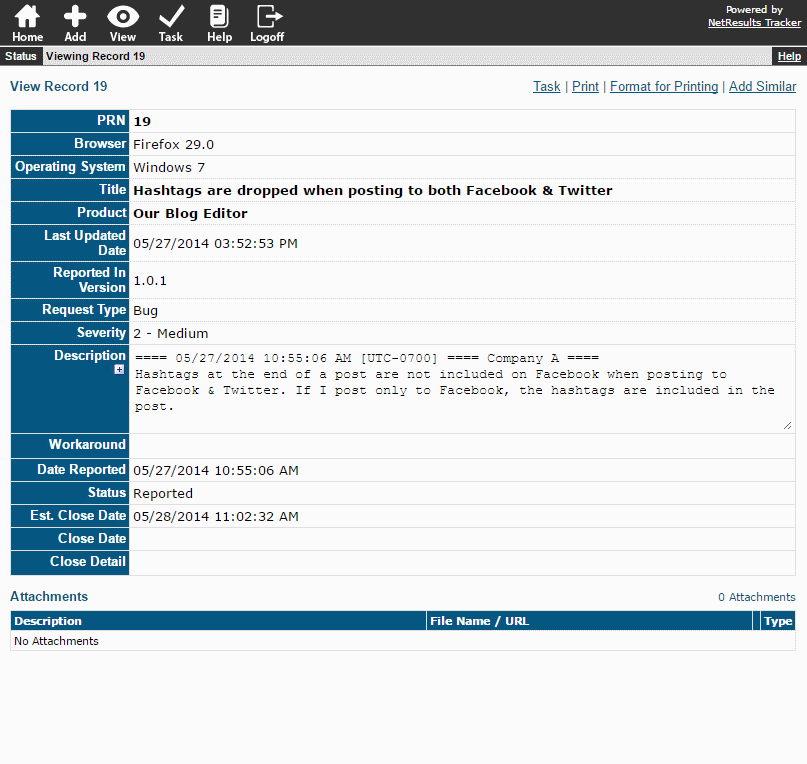
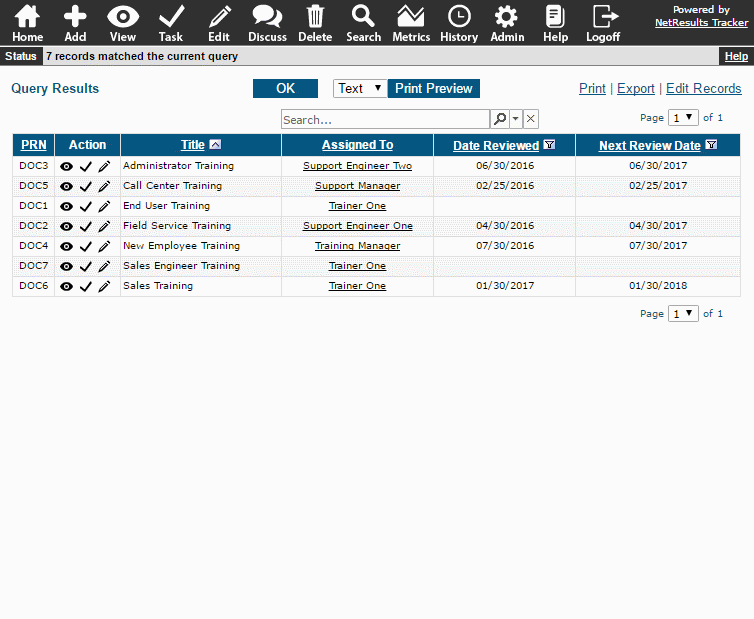
Report Privileges

A Simple View

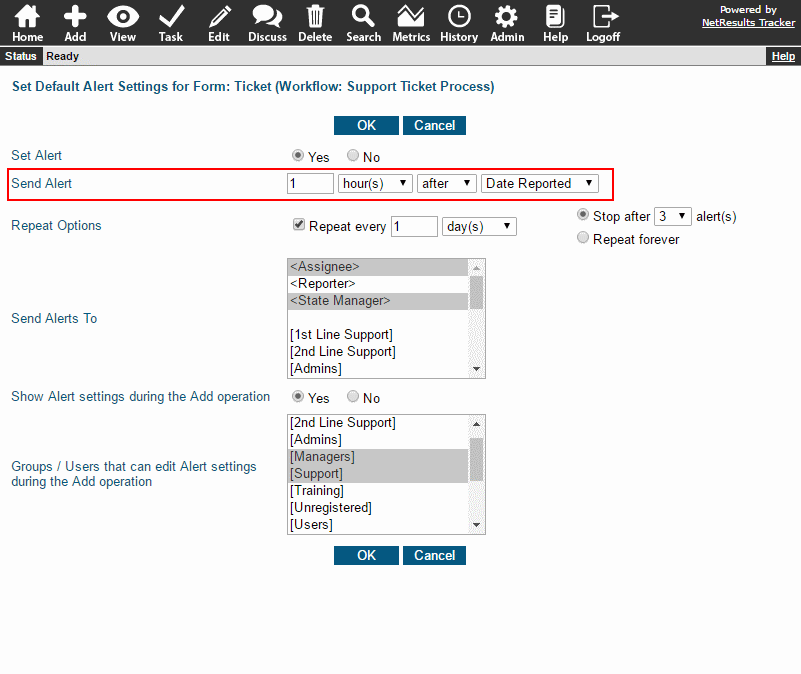
The end result: A few toolbar icons and only the necessary fields and attachments. Alerts, Discussions and Record History disabled.

Minimal View

Use Tracker to develop, manage and maintain your organization's training materials.

Document List

One approach is to simply keep a list of each training document and who owns it. Or, perhaps you just need to keep track of who has received training. These can easily be done by setting up a project and form. And, these can be added to an existing Tracker system while maintaining secure access (users only see the projects and forms accessible to them based on user group privileges).

Training Documents

This blog post explains how to set up a list without a formal workflow.

Review Reminders

You can set a reminder specific to each document for updating it (e.g. some require annual updates, other need more frequent reviews depending on product releases or other milestones).

Reminder to Review

Use the Alerts feature to send reminders for updating training documents.

Workflow

If desired, you can create a formal workflow for developing and publishing these documents.

Training Document Process

The Getting Started Guide is a good resource for building a new workflow. Need Help? Technical Support can answer your questions or even help configure Tracker for you.

Fields can be initialized with a value on the Add Page or in a later workflow step.

Save an Important Date

You can set a date field with the current date and time to capture when an action happened. For example, most of Tracker's templates have a Date Reported field that saves the date and time the record was created and can be used to generate reports. You may want to save other dates such as the date something was approved or closed.

Initialize a Date Field

Date fields can also be set with values relative to other date fields (e.g. 2 days after Date Reported, 1 day before Due Date).

Initialize with a Relative Date

Format a Text or TextArea Field

You can have a value saved in the field automatically. In the sample below, we've saved some text so users can enter information into the field using a specific format.

Initial Value in TextArea Field

Other Field Types

Most fields can be initialized including Floating Point, Integer, Pulldown, Url and YesNo fields.

An Important Caveat

Initializing a field means you're clearing out the existing value and setting it to something else. If you've already saved some text in a field and then are initializing it at some point in the workflow, any text already in the field will be deleted.

Set a Field On Add

To initialize a field when a record is added:

  1. Login as Admin and click on the Admin icon.
  2. Click on the Fields link.
  3. Click on the Edit button to the left of the desired field and set the property listed below based on the field type:
    • Date fields: Set the Initialize on Add property to "Yes".
    • Floating Point, Integer, Text, TextArea or Url fields: Set the Initial Value.
  4. Click OK to save the change.

Initial Value for Floating Point Field

Set a Field Later in the Workflow

To initialize a field during the Task operation:

  1. Login as Admin and click on the Admin icon.
  2. Click on the Workflows link.
  3. Select the desired workflow in the pulldown at the top.
  4. Locate the States section and click on the Manage link to the right.
  5. Click on the state that has the transition you wish to modify, then click on the Transitions button.
  6. Click on the Task Fields button.
  7. Click on the desired field in the right column and click Add (or simply click on the field if it's already added and click on the Edit button).
  8. Use the information about Task Field Properties in the Online Help Guide based on the field type.
  9. Click Update to save the change.

Initialize a Pulldown During Task

Use Metrics to review your process and find steps that can be improved.

A workflow step that involves testing or approval is an easy place to start. For example, you can run a chart that shows how many fixes have been rejected by QA.

Fixes Rejected By QA

This is done using the chart option that calculates how many records moved from one state to another. You can break the data down by a pulldown as we've done with Product.

Chart Options

Reviewing the data can help you identify categories or trends. You may find it helpful to create a pulldown field that categorizes the reasons for rejecting a fix so that reports can be run against that criteria. You can use this field to break down the chart data even further.

Reject Reason

Detailed steps for creating a chart can be found in the Online Help Guide.